1. The Ovation Controller controls the switching of the resident's telephone lines as well as door control and communications with the visitor. The "S" series is the simplest system and uses the same housing as our Spectrum System. The "V" series is similar to the "S", except it has an integral, lighted directory and uses the same housing as our Vista System. Both the "S" and "V" series are available in handset and hands free models. The "S" and "V" series units are mounted at the entrance of the building or complex. It contains a main processor board and, if the unit is a hands-free model, a hands-free board. The "LP" (Lobby Phone) series uses the same controller as the "S" and "V" systems mentioned above, but instead it is housed in a plain NEMA-type enclosure which is mounted in the telephone room or utility closet. In order for a visitor to call the resident, one of two features is installed on the auxiliary port of the controller board; a tone dial telephone or a Vandal-Proof Panel (option). The tone dial telephone is installed in an indoor, lobby area and is used for calling a resident in the building or for gaining entry to the building by dialing entry codes. The Vandal-Proof Panel is a vandal-resistant door unit which is installed next to the entrance of the building or complex (see number 3 below for more details). There is also a Lobby Phone feature which can be used in addition to the "S" and the "V" series of systems. This feature can be used in the handset or in the hands-free models. The controller for each of these systems is then connected to a chain of Line Interface Boards, each of which is connected to as many as twelve resident telephone lines.
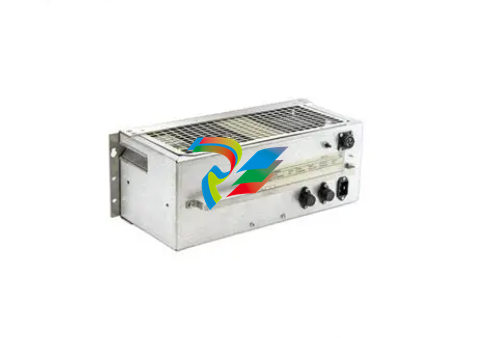
2. The Line Interface Boards (LIBs) allow each resident's telephone line to be connected to the Ovation Controller when a visitor wants to contact that resident. At all other times, the resident's telephone line is connected directly to the telephone company. The Line Interface Boards are contained in an LIB housing which is mounted somewhere inside the building, usually close to the telephone junction box.
3. The Vandal-Proof Panel (option) is located at the entrance of the building/complex and is used in door control and communications with the visitor. The Vandal-Proof Panel is enclosed in a vandalresistant stainless steel enclosure with an audio board and keypad inside. This unit is connected to the auxiliary port on the Ovation controller board. The Ovation System is capable of carrying out the following functions (several of these functions are optional, so check with your dealer to determine which capabilities have been included in your system): 1. Visitor entry: When the visitor presses a "#" key on the controller's keypad followed by the resident's directory code, this switches the selected resident's telephone line to the controller and rings the resident's telephone. The resident can then communicate with the visitor and allow entry at the main door or gate by dialing a "9" on a tone or pulse dialing telephone. If the system is controlling a second door or gate, the resident would dial "5" on a tone or pulse dialing telephone to allow entry at that location. Page 4 of 21 Doc. 6001012 Rev B 2. Call waiting: If the resident's telephone is in use, he/she will hear 2 short tones to signal that a visitor is attempting to contact him/her. The resident can then dial a "2" and the call in progress will be put on hold and the telephone will be connected to the visitor. If the resident allows entry (as described above), he/she will be automatically switched back to the telephone call in progress. The resident can also deny entry and switch back to the call in progress by dialing a "✱". Alternatively, if the resident is talking with a visitor and the resident receives a normal phone call, he/she will hear two short tones at which point he/she can put the visitor on hold and switch over to the normal telephone call by dialing a "2" and back again to the visitor by dialing another "2." 3. Entry codes: Each resident (and any one else you authorize) can have a unique 4-digit entry code. When this code is entered on the controller or lobby phone keypad, it will cause the main door or gate to open. The Ovation can have up to 3,000 entry codes programmed into it.
4. Door monitoring: The installer can place sensors on the door to monitor the status of any door that the system controls. If the door is forced open or held open 60 seconds after it should have been closed, you can program the system to respond in one of the following ways: a. Alarm Call (option)*: The system will first call a pre-programmed outside telephone line and send a message via modem. If there is no modem at the pre-programmed number, whoever answers will hear a series of tones. Pressing any key on their tone dial telephone will acknowledge someone has received the alarm call and the system will connect the answering phone to the system speaker and microphone or ring the Lobby Phone. If the lobby phone is picked up, the answering phone will be connected to the lobby phone. If there is no answer at the pre-programmed number, the system will call the pre-programmed manager lines in their order of priority and report with tones as described above. b. Close a relay: If relay 2 is programmed as an alarm relay, the system will close that relay to activate a device the installer has connected to it (for example, a siren).
5. Free exit through a monitored door: The system can provide free exit through either controlled entry to allow exit without causing a forced open door condition.
6. Access for the Post Office or Fire Department: Connections are included in the system to make certain the post office and fire department can gain access to the building without contacting anyone to allow entry. These features will be connected by the installer and the relevant agency.
7. Direct operator control of doors/gates (option)*: The controlled doors or gates can be activated from the manager's tone dial or any off site tone dial telephone (using the door/gate control functions requires that the remote programming option be purchased).
8. Remote Programming (option)*: The Ovation System can be remotely programmed from the manager's tone dial telephone or from any outside tone dial telephone.
9. Remote diagnostics (option)*: The Ovation system can be called using a terminal connected to a Hayes-compatible modem or a personal computer running terminal emulation software. You can then access information concerning the system's operating parameters, the entry codes programmed into the system, the LIB board numbers used by the system, and the customized directory codes programmed into the system. * These items do not require the installation of a separate reserved telephone line.
ENTERING AND EXITING THE PROGRAM MODE Before you begin programming, your programming source must be activated. Note: Your programming password may not be entered using pulse dial (rotary) telephones. The Ovation can be programmed from one of four programming sources:
1. Keypad mounted to the faceplate: Enter three asterisks ("✱✱✱") followed by the six digit user defined password (factory set to 000000). The unit will respond with one beep and a "P" will be displayed. If the LP model is installed, the keypad for programming the controller is inside of the enclosure, or the lobby phone may be used (as described in the next section), but no display will be available.
2. Lobby phone keypad: Lift the receiver and enter three asterisks ("✱✱✱") followed by the six digit user defined password (factory set to 000000). The unit will respond with one beep. PLEASE NOTE: If you have an "LP" model with a Vandal-Proof panel attached, you will not be able to program the system from the Vandal-Proof panel keypad.
3. Manager's telephone (option)*: Enter three asterisks ("✱✱✱"), the unit ID number, and the six digit user defined password (factory set to 000000). The unit will respond with one beep. The manager's telephone lines are assigned in step 13. See page 12 for details on the uses of the manager line.
4. Remote telephone (option)*: Dial the manager's telephone number on a tone dialing telephone
and wait for the system to automatically answer and respond with a beep. (The number of rings it
will take the system to answer is set in step 05). Enter three asterisks ("✱✱✱"), the unit ID number,
and the six digit user defined password (factory set to 000000). The unit will respond with one
beep.
+ NOTE: For single unit installations, the unit ID number will always be a "1". * These features are available to the programmer if the unit was purchased with the remote programming option. See sections 9 and 10 for a more detailed discussion of this option. Once you have completed a programming step and you are finished programming the Ovation system altogether, you need to exit the programming mode for a system to begin working. Follow the steps below to exit the programming mode.
1. To exit the programming mode, press the "✱" key on your programming source.
2. If you are programming from the keypad on the faceplate of the unit, to ensure you have exited the programming mode, a tone will be emitted and the "P" should disappear from the display.
3. If you are programming the Ovation from a source other than the faceplate keypad (i.e. manager's telephone, lobby telephone, etc...), you will only hear a tone to notify you that you are out of the programming mode.
STEP 67 - TURNING OFF/ON SPECIAL OPTIONS Purpose To have the ability to turn on/off the special options that you have purchased with your system. Format 67 + 1 digit + (0=Off, 1=On) + #. Command 0=Remote Programming Variables 1=Remote Diagnostics 2=Alarm Call 3=Entry Codes 4=Custom Directory Codes and Individual Line Call Waiting Example 67 + 2 + 0 + # (turns off the Alarm Call option for the entire system) Important This area only allows you to control whether you want to enable or disable the options that Notes were purchased with the system. It is not possible to enable a feature that was not purchased with the system through this step. If you wish to view the options which are currently active in your system, press "67" + #. The system will then list the options in the order shown in the "Command Variables" section above. If the system displays a "1" for the option, that option is currently active in your system. If the system displays a "0" for the option, that option is currently not active in your system. If you wish to view the options that were purchased with the system, press "67" + "0" + #. The system will then list the options in the order listed above. If the system displays a "1" for the option, that option was purchased. If the system displays a "0" for the option, that option was not purchased. STEP 52 - RESETTING THE SYSTEM Purpose To have the ability of resetting the system without disconnecting the power to the whole system. This step is only needed if you are adding a unit or an LIB. Format 52 +# Important The system will automatically reset itself once the "52" and "#" have been programmed. Notes
Address:Xiamen City, Fujian Province, China
TELL:
E-MAIL:gedcs868@gmail.com