parkerQUICK START MANUAL VM600 machinery protection system (MPS)
Refer to the VM600 machinery protection system (MPS) hardware manual
and observe all safety instructions before replacing VM600 cards
Cards in a stand-alone rack
NOTE: The following remarks concern stand-alone racks. These do not contain a CPUM
card are not connected to a network.
For a stand-alone rack, hardware damage can occur if a card intended for slot mm is inserted
in slot nn.
NOTE: For further information on replacing VM600 cards in a stand-alone rack, refer to the
VM600 machinery protection system (MPS) hardware manual.
3.1.3 Cards in a networked rack
NOTE: The following remarks concern networked racks. These contain a CPUM card
(and, optionally, its associated IOCN card) and are connected to a network.
For a networked rack, if a card originally used in slot mm is inserted in slot nn, the CPUM card
recognises that the card’s configuration does not match the slot.
The behaviour of the CPUM card after it detects a change of configuration for a card depends
on:
• The version of the CPUM card’s firmware.
• And for CPUM firmware version 067 or later – the setting of the CPUM’s configuration
master parameter.
NOTE: For further information on replacing VM600 cards in a networked rack, refer to the
VM600 machinery protection system (MPS) hardware manual.
Because of this, a different MPC4, AMC8 or IRC4 card must only be installed
‘live’ and without reconfiguration if its configuration is known to be
identical to that of the card previously removed.
Because of this, problems can occur if a card taken from slot nn of rack x
is inserted into slot nn of rack y, as different slots can be used for totally
different functions in each rack.
This form of hot swapping should be avoided unless you are certain that
the cards in slot nn of each rack have exactly the same configuration.
More generally, if you do not know how a card is configured, you should not
install it until the configuration is known.
3.1.4 Hot swapping cards in a VM600 rack
See 3.1 Replacing cards before removing or inserting a card.
3.1.4.1 Hot swapping a card in the front of a VM600 rack
The procedure for hot swapping a card in the front of a VM600 rack is as follows.
In the front of the rack:
1- Disconnect the external cables connected to the card, if any.
2- Remove the card from the rack (see 3.1.4.3 Removing cards safely).
3- Insert the replacement card in the front of the rack.
4- Reconnect any cables to the card.
3.1.4.2 Hot swapping a card in the rear of a VM600 rack
The procedure for hot swapping a card in the rear of a VM600 rack is as follows.
First, in the front of the rack:
1- Remove any associated processing card in the corresponding slot in the front of the rack
from the rack’s backplane (see 3.1.4.1 Hot swapping a card in the front of a VM600 rack).
Then, in the rear of the rack:
2- Disconnect all external cables connected to the card.
3- Remove the card from the rear of the rack (see 3.1.4.3 Removing cards safely).
4- Insert the replacement card in the rear of the rack.
5- Reconnect all of the cables to the card.
Finally, in the front of the rack:
6- Reinsert the associated processing card in the corresponding slot in the front of the rack
(to the rack’s backplane).
3.1.4.3 Removing cards safely
The AMC8, MPC4, IOC4T, IOC8T, RLC16 and IRC4 cards all feature a lever mechanism to
help the user to easily remove the card. Follow the procedure below and see Figure 3-1):
1- Disconnect all external cables connected to the card, for example, the communication
cable (RS-232) for an MPC4 card or front-end cables (J1, J2 and J3) for an IOC4T card.
2- Unfasten the two captive fixing screws. These are found at the top and at the bottom of
the front panel.
3- With your thumbs, simultaneously push the upper handle upwards and the lower
handle downwards. These combined actions will cause the card to move forwards by
1 to 2 mm.
4- Pull on both handles together (with equal force) to extract the card from the rack.
NOTE: Remember to reconnect all of the cables after a card is replaced in the rack.
Before ‘hot swapping’ a card in the rear of a VM600 rack, any associated
processing card in the corresponding slots in the front of the rack must be
disconnected from the rack’s backplane.
Software configuration
The following procedure can be used to configure VM600 MPSx software after replacing a
card:
1- Disconnect the front-end components (that is, transducer, signal conditioner, probe and
cables) from the rack by unfastening the connectors on the IOC4T or IOC8T card
installed in slot nn.
2- Insert into slot nn the MPC4 or AMC8 card whose configuration you want to read.
3- Use one of the VM600 MPSx software packages (MPS1 or MPS2) to read the
configuration of the card in slot nn
(Communications > From MPC > Read Configuration).
See example in Figure 3-2, in which the card in slot 3 is selected.
4- Modify the card configuration if necessary using the VM600 MPSx software.
5- Use one of the VM600 MPSx software packages (MPS1 or MPS2) to send the (modified)
configuration to the card in slot nn
(Communications > To MPC > Send Configuration).
6- Reconnect the front-end components to the connectors on the IOC4T or IOC8T card
installed in slot nn.
-
 Honeywell TDC‑3000 BASIC,CG Computer Gateway,80360206‑001
 -
 Honeywell TDC‑3000 BASIC,HG High‑Speed Gateway,51304526‑100
 -
 Honeywell TDC‑3000 BASIC,HM History Module,51191596‑200
 -
Honeywell TDC‑3000 BASIC,HM History Module,51191596‑100
-
 Honeywell TDC‑3000 BASIC,AM Application Module CPU,51401551‑800.K2LCN‑8
 -
 Honeywell TDC‑3000 BASIC,AM Application Module CPU,51401551‑600.K2LCN‑6
 -
 Honeywell TDC‑3000 BASIC,AM Application Module CPU,51401551‑400,K2LCN‑4
 -
 Honeywell TDC‑3000 BASIC,AM Application Module CPU,51401551‑300.K2LCN‑3
 -
 Honeywell TDC‑3000 BASIC,AM Application Module CPU,51401551‑200,K2LCN‑2
 -
 Honeywell TDC‑3000 BASIC,US Universal Station CPU,51401288‑200
 -
 TDC‑3000 BASIC,US Universal Station CPU,51401288‑100
 -
 SHINKAWA VM-21P1 Signal Conditioner 0-50MM 24VDC
 -
 Shinkawa RiverNew Vibration Transducer VK202 Series
 -
 Shinkawa Electric VM-3E2 Vibration Monitor Module
 -
 Shinkawa JBP-47 P-22-48A-1 / P-22-48B-1 Circuit Board Module
 -
Shinkawa MODEL VM-5K DUAL VIBRATION MONITOR
-
 Shinkawa CMU-15A (CMU15A) Industrial Camera Controller
 -
 Shinkawa CMU-13A CMU13A Industrial Camera Controller
 -
 Shinkawa EFU-10 (EFU10) Spark Generator Unit
 -
 Shinkawa UTC-1000 ZUP-02C Board
 -
 Shinkawa MDP-89 MDP89 P-24-674A P-24-674B Circuit Board Module
 -
 Shinkawa CB-1011005001 Signal Cable Assembly
 -
 SHINKAWA VL-202A08L-1002 Sensor VL-08020L01 Probe Cable F84N1695
 -
 Shinkawa VK-202A2 Driver & VL-202A08L-1A72 Proximity Sensor Probe
 -
 SHINKAWA VM-703B VIBRATION MONITORING SYSTEM CARD 2R05-002-P001C
 -
 Shinkawa BH-150-03 Signal Conditioner / Preamplifier Unit
 -
 Shinkawa BH-150 BH150 Signal Conditioner / Preamplifier Unit
 -
 Shinkawa Electric VM-3D2 Thrust Monitor Module
 -
 Shinkawa LCU-37 Monitoring module
 -
Shinkawa LCU-44B-06 Local Control Unit Module
-
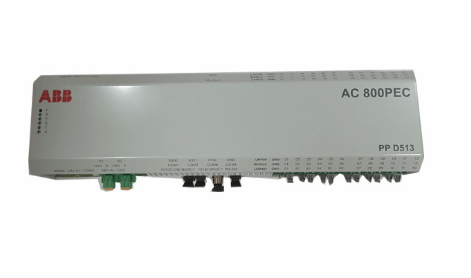 ABB 3BHE039724R2643 PPD513 high-performance programmable controller module
 -
.png) Samsung SSAS21-RTD Resistance Temperature Detector Input Module
Samsung SSAS21-RTD Resistance Temperature Detector Input Module -
.png) Samsung SSAS21-DO Digital Output Module
Samsung SSAS21-DO Digital Output Module -
Samsung SSAS21-DI Digital Input Module
-
.png) Samsung SSAS21-CPU Central Processing Unit Module
Samsung SSAS21-CPU Central Processing Unit Module -
 Samsung SMTB-RTD RTD/TC Terminal Board
 -
.png) Samsung SMTB-AI Analog Input/Output Terminal Board
Samsung SMTB-AI Analog Input/Output Terminal Board -
Samsung SMTB-DO Digital Output Terminal Board
-
.png) Samsung SMTB-DI Digital Input Terminal Board
Samsung SMTB-DI Digital Input Terminal Board -
SAMSUNG SMBK-12 IOU Rack Backplane
-
SAMSUNG SMBK-08 IOU Rack Backplane
-
SAMSUNG SMPS-08 Rack Power Module
-
.png) SAMSUNG SMCOM-08 Communication Expansion Card
SAMSUNG SMCOM-08 Communication Expansion Card -
SAMSUNG SMPI-8 Pulse Count Input Module
-
SAMSUNG SMTC-8 Thermocouple Input Module
-
SAMSUNG SMAOC-12 Analog Output Module (12CH)
-
SAMSUNG SMAOC-8 Analog Output Module (8CH)
-
SAMSUNG SMAIC-12 Analog Current Input Module (12CH)
-
SAMSUNG SMRTD-8 RTD Pt100 Temperature Input Module (8CH)
-
SAMSUNG SMAIC-8 Analog Input Module (8CH)
-
SAMSUNG SMDO-8 Digital Output Module (8CH)
-
SAMSUNG SMDI-8 Digital Input Module (8CH)
-
 SAMSUNG SMCPU-08 Central Processing Unit Controller
 -
 Embedded MXM GPU Modules EGX-MXM-A4500 ADLINK
 -
 Embedded MXM GPU Modules EGX-MXM-AD2000 ADLINK
 -
 ADLINK Embedded MXM GPU Modules EGX-MXM-AD3500
 -
 ADLINK Embedded MXM GPU Modules EGX-MXM-AD5000
 -
 Embedded MXM GPU Modules EGX-MXM-AD ADLINK
 -
 Embedded MXM GPU Modules MXM-AXe ADLINK
 -
 ADLINK Embedded MXM GPU Modules EGX-MXM-BW500
 -
 Embedded MXM GPU Modules EGX-MXM-BW2000 ADLINK
 -
 ADLINK Embedded MXM GPU Modules EGX-MXM-BW4000
 -
 Embedded MXM GPU Modules EGX-MXM-BW5000 ADLINK
 -
SAMSUNG SSAS-PRO SPTB-AI dedicated analog input terminal board
-
SAMSUNG SSAS-PRO SPTB-DO dedicated digital output terminal board
-
SAMSUNG SSAS-PRO SPTB-DI dedicated terminal board
-
SAMSUNG SSAS-PRO SPBK-X32-12 Heavy-duty 8-slot system chassis backplane
-
SAMSUNG SSAS-PRO SPBK-X32-08 Heavy-duty 8-slot system chassis backplane
-
SAMSUNG SSAS-PRO SPSU-X32 heavy-duty rack-mounted
-
SAMSUNG SSAS-PRO SPIRU-16 versatile universal mixed I/O module
-
SAMSUNG SSAS-PRO SPRI-16 RTD Temperature Input Module
-
SAMSUNG SSAS-PRO SPAO-8 Analog Output Module
-
SAMSUNG SSAS-PRO SPAI-16 Analog Input Module
-
.png) SAMSUNG SSAS-PRO SPRDO-16 Relay digital output module
SAMSUNG SSAS-PRO SPRDO-16 Relay digital output module -
SAMSUNG SSAS-PRO SPDO-16 (Transistor Digital Output Module)
-
SAMSUNG SSAS-PRO SPDI-24 high-density digital input module
-
SAMSUNG SPDI-16 (Digital Input Module)
-
 ADLINK 3U Enclosures & Systems AD-3100
 -
 Power Supplies cPS-H300S/AC ADLINK
 -
Power Supplies cPS-H300S/AC ADLINK
-
 CPCI Serial Peripheral cPCI-A3H10 ADLINK
 -
 ADLINK CPCI Serial Peripheral cPCI-A3XMC
 -
 CPCI Serial Peripheral cPCI-A3H20 ADLINK
 -
 CPCI Serial Peripheral cPCI-A3MXM ADLINK
 -
 ADLINK CPCI Serial Peripheral cPCI-A3COM
 -
 CPCI Serial Peripheral cPCI-A3USB ADLINK
 -
 ADLINK CPCI Serial Peripheral cPCI-A3ETH
 -
CPCI Serial Peripheral cPCI-A3CAN ADLINK
-
 3U CompactPCI Serial Blades cPCI-A3525 Series
 -
 3U CompactPCI Serial Blades cPCI-A3535 Series ADLINK
 -
 CompactPCI Backplanes cBP-6402 ADLINK
 -
ADLINK CompactPCI Backplanes cBP-6402R
-
 ADLINK CompactPCI Backplanes cBP-6105R
 -
 CompactPCI Backplanes cBP-6405R ADLINK
 -
 CompactPCI Backplanes cBP-6108F ADLINK
 -
 CompactPCI Backplanes cBP-6108R ADLINK
 -
 CompactPCI Backplanes cBP-6014R ADLINK
 -
 ADLINK 6U Enclosures & Systems cPCIS-6130R
 -
 ADLINK 6U Enclosures & Systems cPCIS-6230R/ 6240R Series
 -
 ADLINK 6U Enclosures & Systems cPCIS-6235R
 -
 ADLINK 6U Enclosures & Systems cPCIS-6400X Series
 -
 ADLINK 6U Enclosures & Systems cPCIS-6400U Series
 -
 ADLINK 6U Enclosures & Systems cPCIS-6418U
 -
 ADLINK ADLINK 6U Enclosures & Systems cPCIS-3300BLS
 -
 ADLINK 6U Enclosures & Systems cPCIS-3320/AC
 -
 ADLINK Power Supplies cPS-H640/AC
 -
 ADLINK Power Supplies cPS-H640/48
 -
 ADLINK 6U Rear Transition Modules cPCI-R6100 Series
 -
 ADLINK 6U Rear Transition Modules cPCI-R6002 Series
 -
 ADLINK 6U Rear Transition Modules cPCI-R6600 Series
 -
 ADLINK 6U CompactPCI 2.0 Blades cPCI-6660
 -
.png) ADLINK 6U CompactPCI 2.0 Blades cPCI-6636(KL) Series
ADLINK 6U CompactPCI 2.0 Blades cPCI-6636(KL) Series -
 ADLINK 6U CompactPCI 2.0 Blades cPCI-6640 Series
 -
 ADLINK 6U CompactPCI 2.0 Blades cPCI-6540 Series
 -
 ADLINK CompactPCI Backplanes cBP-3064
 -
 ADLINK CompactPCI Backplanes cBP-3213PR
 -
 ADLINK 3U Enclosures & Systems cPCIS-2500 Series
 -
 ADLINK 3U Enclosures & Systems cPCIS-2630 Series
 -
 ADLINK 3U Enclosures & Systems cPCIS-2632 Series
 -
 ADLINK 3U Enclosures & Systems cPCIS-2642 Series
 -
 ADLINK U Enclosures & Systems cPCIS-2633 Series
 -
 RS20 -2400M2M2SDAPHC09.0.14 Hirschmann Switch
 -
 ADLINK U Enclosures & Systems cPCIS-ET1100 Series
 -
 ADLINK Power Supplies cPS-H325/AC
 -
 ADLINK Power Supplies cPS-H325/48
 -
 ADLINK Power Supplies cPS-H325/110
 -
 ADLINK Power Supplies cPS-H325/24
 -
 ADLINK PCI-7841/cPCI-7841 Dual-port Isolated CAN Interface Cards